Module 02
Creating a Job
How to create a new job in SquareCoil from start to finish — project details, customer info, billing, and scope of work.
4 sections
01
Starting a New Project
Content Coming Soon
This section will cover where to click to start a new project in SquareCoil.
02
Entering Customer Information
Content Coming Soon
This section covers how to search for or create a customer contact and link them to the job.
03
Entering Billing Information
Content Coming Soon
This section covers how to enter the billing address, billing contact, and payment terms.
04
Entering the Scope of Work
Overview
Getting the scope of work formatted correctly at the early stages of a project is extremely important — it sets you up for success at every key milestone that follows.
Steps
-
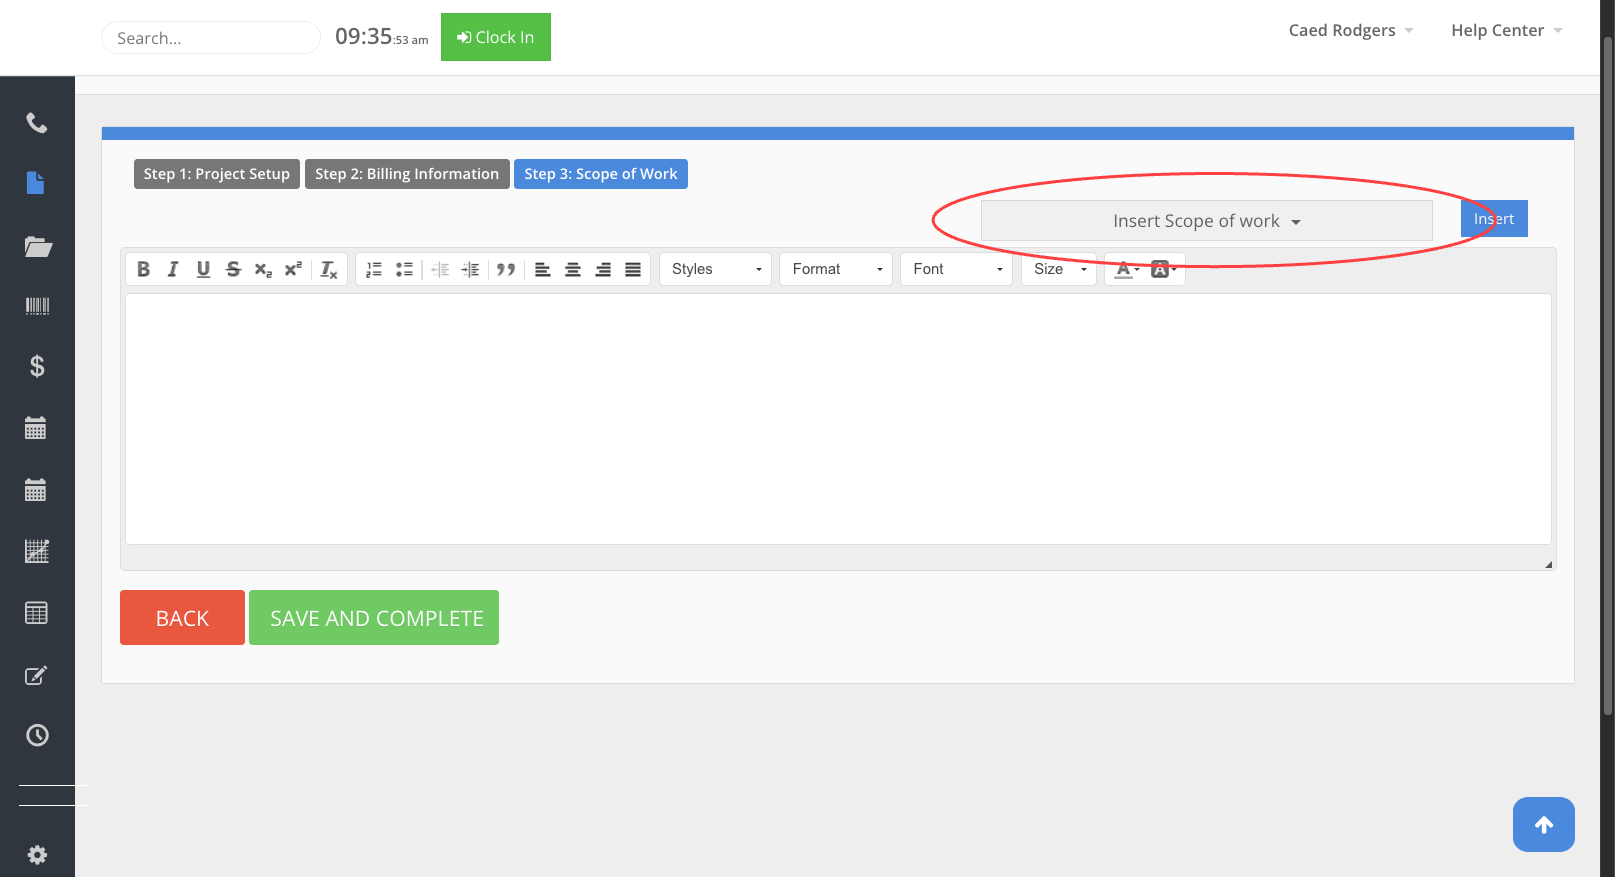
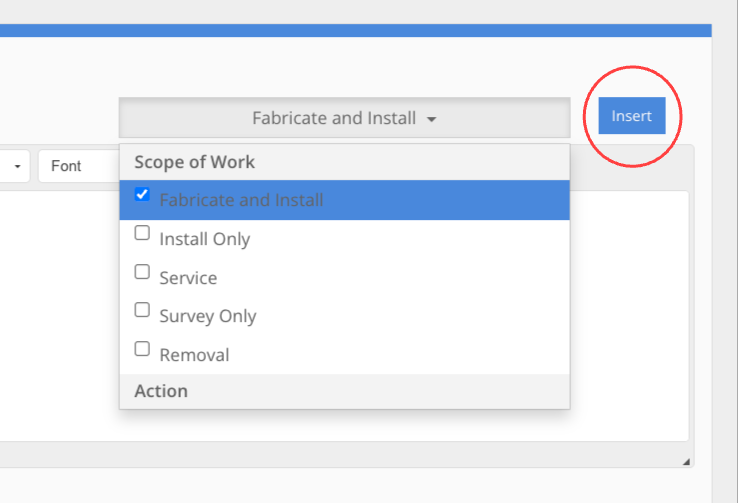
1Click "Insert Scope of Work"This will open a dropdown with all available scope types. Fabricate and Install and Install Only are the two most common scopes you will use.
-
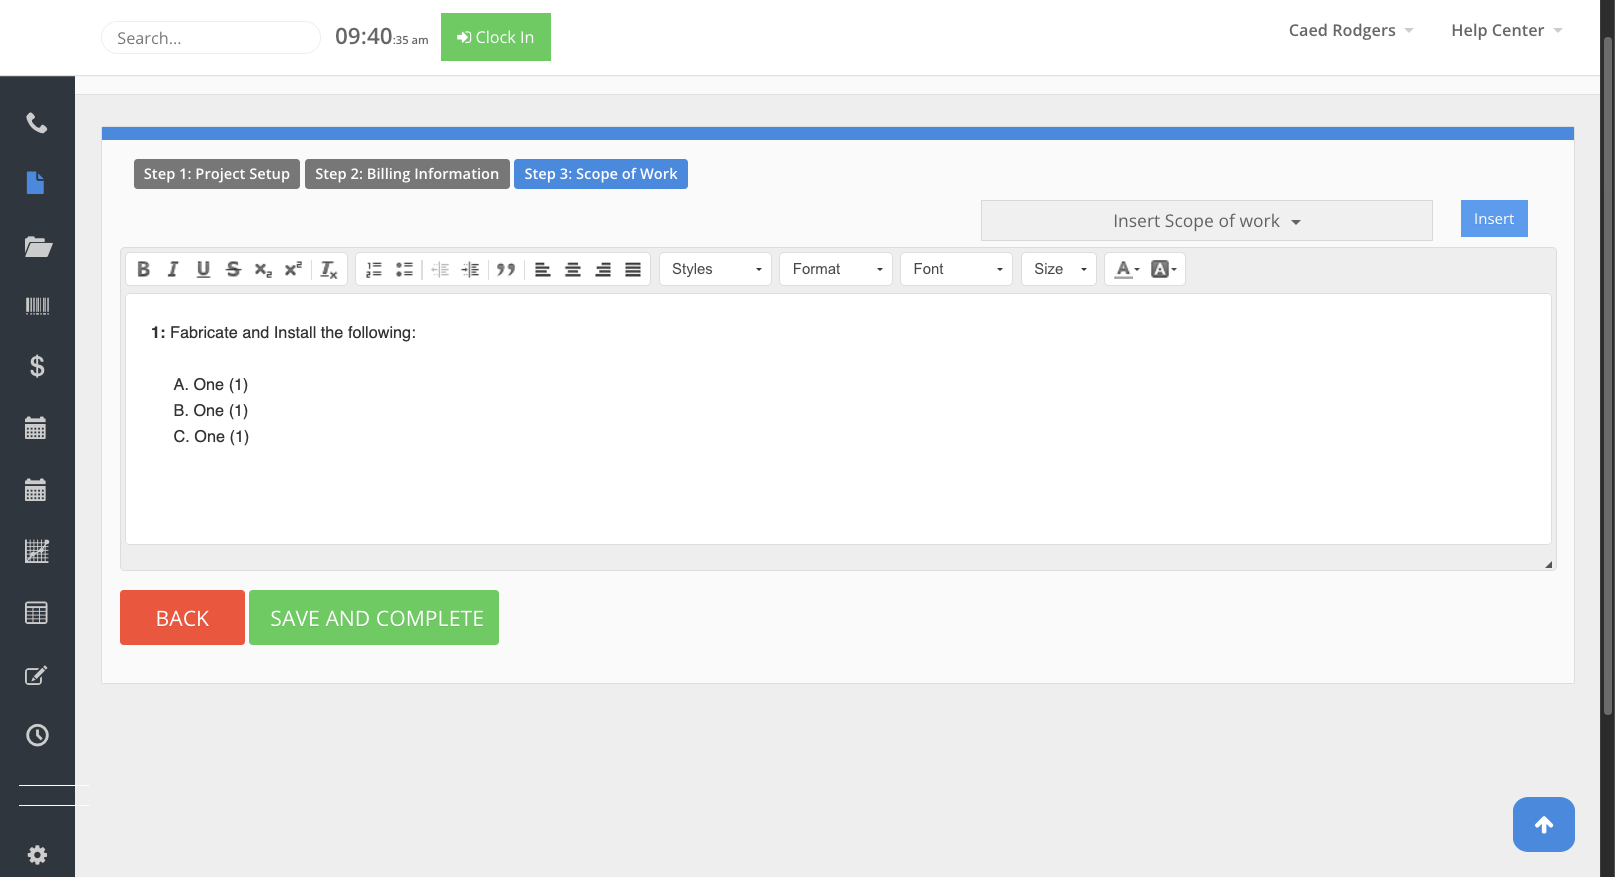
2Select the appropriate scope and click "Insert"Once you click Insert, the text box will automatically populate with a pre-formatted scope template.
-
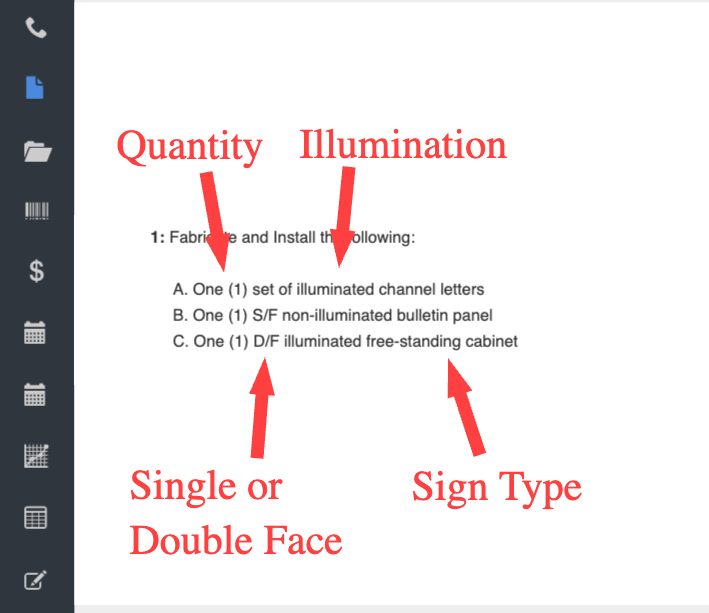
3Write out the scope of workFollow the same lettered listing format (A, B, C…) that was auto-generated — this structure will be referenced at key milestones later in the project. Fill out each line item in this order:
- Quantity — e.g., One (1)
- Face or Set — S/F (single face), D/F (double face), Set of, etc.
- Illumination — Illuminated or Non-illuminated
- Sign Type — Channel letters, face change, cabinet, etc.
-
4Add additional scopes as neededUse the same "Insert Scope of Work" dropdown to add any additional scopes — for example, Removal when existing signage needs to come down. Each inserted scope appends a new numbered section to the text box.
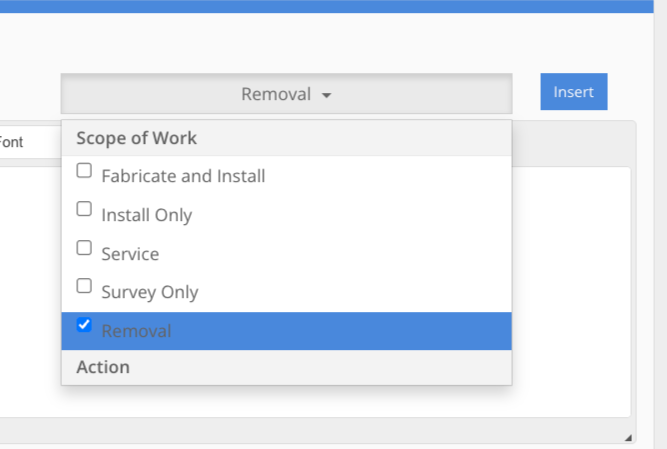 Select the additional scope from the dropdown
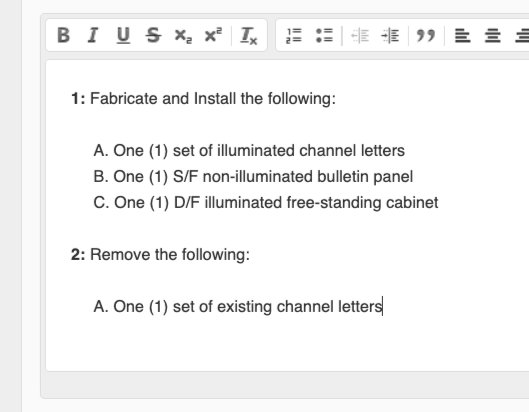 Both scopes now appear in the text box
-
5Click "Save and Complete"Once the scope is finalized, click Save and Complete to create the project in SquareCoil.
Tip: If you have two of the exact same sign type, add a short descriptor at the end of each line item to differentiate them. For example: A. One (1) set of illuminated channel letters – 15" option · B. One (1) set of illuminated channel letters – 20" option.
Note: The lettered list format (A, B, C…) is intentional. It is referenced throughout the project lifecycle — keep it consistent from the moment you create the job.